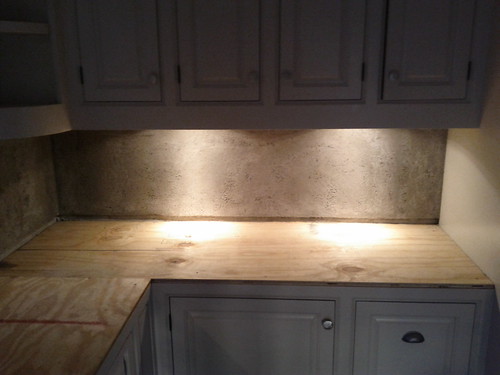
Thanks to Jay Harris from Home Depot for sharing some awesome ideas on under-cabinet lighting... Good stuff!
Trying to lighten up in the kitchen? Want more radiance in the bathroom? Under-cabinet and below-shelf lighting may be just the illumination you seek. Convenient, sleek, and often camouflaged, such focused task lights offer just a bit of brilliance where needed. Here are a few of the brightest DIY options, as well as details on installing each.
Rope Lighting
Often available in kits, rope lighting comes in a variety of colors and can also be hidden with paintable cord covers. The flexible LED tube offers a low-cost light source along an entire cabinet, shelf, or railing and plugs into an ordinary wall outlet.
Use a pencil to draw the exact route you're planning for your rope lighting.
Drill any holes needed (for instance, if you're threading the light from the interior of one cabinet to the next) using a drill bit that is slightly larger than the thickness of your light.
Measure how long your rope light will need to be, then cut it, keeping in mind that the light may only be safely cut in specific areas (often at 18-inch intervals; consult the manufacturer's instructions to be sure).
Thread your light through the holes and attach cable clips for support where necessary.
Place the plastic cap from the kit on the end farthest from the power source.
On the other end, insert the male electrode into the rope light conductors. Attach and tighten the provided collar and sleeve, then fit the female connector (attached to the power cord) to the male electrode spikes. Screw on the support connector to ensure the male and female connectors remain together.
Then simply plug in the power cord. Use a switch-operated outlet to eliminate the need to plug and unplug the light.
Fluorescent Lighting
Fluorescent lighting comes in lots of shapes and sizes that are easy to install. Though the bulbs may distort colors slightly, they are energy efficient and long lasting. Depending on the model you buy, this thin-profile light source can be wired into place or plugged into a regular socket. Unless you feel comfortable with electrical work, I recommend the latter.
Remove the diffuser and bulb from the fixture to gain access to the screw holes.
Holding the fixture up to the underside of the cabinet where you would like it to be placed, use a pencil to mark the drill holes. (Bring the fixture as far forward as possible, at least two inches from the wall. You also want to situate it close enough to an outlet for the plug to reach.)
Using your marks as a guide, drill pilot holes into the bottom of the cabinet.
Attach the fixture using the screws provided. (Before screwing it in, be sure the supplied screws aren't longer than the shelf is thick -- if so, they will poke up through the bottom of the cabinet and you will need shorter screws.)
To control the cord placement, strategically place cord clips along the underside of the cabinet and the wall, or install lengths of self-adhesive conduit to conceal the cord.
Reinstall the bulb and diffuser and then plug in your light. Just as with the rope lighting, a switch-operated outlet eliminates the need to plug and unplug the light.
Puck Lighting
Inexpensive puck lights provide perfect color accuracy and are relatively easy to install, gaining power via an outlet or a hard-wired transformer. While halogen lights are safe under cabinets, they're too hot to be mounted inside a cabinet or near plastic or paper goods. For a cooler option, choose xenon bulbs.
Lay the pucks, in the arrangement you would like them to appear, directly below the cabinet/shelf to which you will be mounting them. (Hint: Measure the distance from the bottom of the cabinet to the countertop -- this is how far your lights should be mounted from one another.) Be sure to allow room for the cord of the final puck to reach an outlet.
Remove the trim ring and lens from each puck, then use the puck or a template (if provided) to mark drill holes on the underside of the cabinet.
Drill pilot holes slightly smaller than the supplied screws. (Just as with the fluorescent light installation, be sure the screws aren't too long.)
Attach the lights to the cabinet.
Wire the puck series together using the plug-in cables provided in the kit, and then secure the wires behind or underneath the cabinet and down the wall using wiring clips.
Power the lights by plugging the last puck into an outlet or connecting it to a transformer (if you have the know-how).
Do these ideas set off any light bulbs for brightening up your own spaces? If you have installed your own lighting before, do you have any tips for first-timers that I might not have covered above?
Jay Harris is a Home Depot sales associate and contributes regularly to Home Depot's blog. His electrical interests in the home include home security systems and home automation.

