Thursday, December 5, 2013

Guest Post - Fabulous and Functional Front Door Spaces

If you're like most people, you would love extra storage space but you don't have the actual real estate to make it happen. But that's not necessarily true!

One of the most underutilized spaces in the home is the entryway – whether it's the front door, the side entrance from the garage, or the back door, the fact remains that the doorways you use are ripe for storage space renovations.


Think about it: how many times have you:
  • Been late to a meeting or social gathering because you couldn't find your keys?
  • Missed deadlines for paying bills or responding to mail because you have no means for separating the junk mail from the important stuff, and you've dumped it all in one pile to deal with a "later" that never happens in time?
  • Tracked dirt through your clean living room because you haven't created a place to store your shoes by the door and away from Fido's fangs?
If you answered "yes" to any of the above, you're in need of a front door storage space to serve as a "drop zone" for when you stumble through the door loaded down with items.

Fortunately, fabulous and functional entryways are within reach.

Foyer Facets

Here are some of the things you should include in your embellished entryway.

Door Mat: By placing this inside the house, you can effectively clean paws and pads while keeping your mats protected from the harsh, ever-present outdoor elements. It's okay to have a mat inside AND outside (and it reminds guests that you're serious about them wiping their feet!)

Umbrella Stand: Even if you don't use an umbrella all the time, avoid the time-consuming hunt when it's pouring by keeping your umbrella fashionably stored by the front door. Plus, when you get home, you'll no longer drop the dripping mess on your floor.

Smarter Storage

In terms of the storage pieces you can use, your imagination is really the limit. Just make sure they address your needs, and if you are short on space, go with multi-functional units like these:
  • Bench/Trunk Units: These provide a place to sit down and put on your shoes, as well as a way to keep them protectively stored inside when you're not using them.
  • Dressers with Drawers: Since these are taller furniture pieces, they serve as a place to drop your keys and mail, plus they have compartments for storing shoes, upcoming bills, take-out menus that pile up outside, magazines, etc. Assign the drawers to individual things and make sure everyone in the family knows what goes where.
  • Shelf Ledges with Hooks: Installing shelf units with hooks provides a flat surface for placing mittens, hats, and leashes, in addition to offering a means to hang up jackets, keys or even umbrella handles.
Entryway Extras

Depending on your individual needs, you might also consider including some of these aspects of storage/functionality in your drop zone.

Wall Clock: If time is money, we could all do with a bit more of it! Help yourself out by placing a decorative wall clock near your storage setup so that you're more likely to stay on track and on top of that valuable commodity that is so easy to lose.

*Tip: If you are always running late, set your clocks ahead (anywhere from 10-30 minutes) so that whenever you glance at it for the time, you will pick up the pace. Subconsciously, you'll register that you're running late (as usual) but the difference now is that you won't actually suffer the consequences because you'll always be on time!

Mirror: Mirrors are fabulous front entry pieces for at least 3 distinct reasons.
  • They enhance the spatial feel of a room by reflecting whatever light is available and bouncing it around the space. For many people, the entry is relatively dark once the door is closed, so any help you can get in the lighting department is great.
  • They double as wall art – no matter the size or level of decorative embellishment, they effectively utilize that oft-overlooked wall space.
  • You always have a means to check your hair or your teeth before heading out the door!
Lamp: And on the subject of bright ideas, add a table or floor lamp to the front door drop zone.

Lamp lighting is necessary when you have no overhead lighting available – you need to see when you walk through the door! Not only does it enhance the safety aspect of coming home (you can see immediately if something is amiss and you're by the front door for a quick exit if necessary), but if you have pets and children, turning on a light prevents tripping over and bumping into the little entities at your feet.

At the same time, having a lamp is a nice alternative when you do have overhead lighting. By selecting one with dimmer capabilities, you can choose just the right amount of ambience to illuminate your newly equipped storage spaces.

What are some of the ways you've created fabulous and functional storage spaces around your home entryways?
__________________________________________________

Jessica Johnson works for www.extraspace.com and contributes to the Extra Space Storage blog, exploring various aspects of organizing and storing possessions.

Big thanks to Jessica for contributing to the blog today... Hopefully we'll see her back soon with more great info! 

Friday, September 6, 2013

Friday Find - Stone Forest Salus Potting Sink

As the push for outdoor living spaces reaches a fevered pitch, I'm more interested in the outdoor spaces that we where we do more working than living.

I'm still waiting on some sort of recliner/lawn mower that allows me to watch a movie on my iPad while I "mow" the lawn... Until that technology exists, I'll happily love the goodies that make outdoor work just as nice as outdoor relaxing.

With the autumn gardening season firing up, I long for a super awesome stone sink. Check this one out.


This is the Salus Potting Sink from Stone Forest. If you aren't familiar with them already, you should acquaint yourself quickly. Everything they do is awesome. 

The Salus is honed granite and would hold up to the rigors of even the most accomplished green thumb.


Check out the Stone Forest website and get one for your house. I might even come over to use it.

Thursday, June 27, 2013

Sink-Spotting: Lenova Entertainer

Second sinks in kitchens are not new. Even giving a secondary sink a very narrow job description has become more and more common... Remember when we called them "salad sinks"? Did anyone actually use one for salad?

Many times, even in large kitchens, a poorly located secondary sink often ate up valuable work space that otherwise could have left a large uninterrupted multi-use part of a kitchen. Fortunately, many of the sink manufacturers are now offering something other than a standard salad sink(that's usually too big) or a bar sink(that's often too small).

Check out the Entertainer from Lenova:


Notice that the narrow design allows for installation in just about any size island(or along a standard depth run of kitchen/bar/entertainment cabinets). The undermount installation along with drop in cutting boards covers the sink completely... And presto! Work space maintained!


Unique inserts for chilling beverages, draining glasses, holding garnish and condiments make the space almost universally workable.


After your big party, clean up will be a breeze. 

Did you notice in the pictures that there was no faucet? Pretty interesting concept, eh? Exactly how much would you need the sink for water, but using it with ice and beverages the main requirement is a drain. The Entertainer has a seamless drain that allows for super easy clean up and virtually no maintenance.

I need one of these in my kitchen.

Thursday, May 16, 2013

Genius Moment - Dine Ink Utensils

There have been a few occasions that I have needed utensils- Once, I got conned in to a family experience at Dolly Parton's Dixie Stampede in Pigeon Forge and just as the horses came out and I got a whole chicken sat in front of me I asked for utensils. The kind Colonial/Western server politely informed me that there was no silverware. Seriously? Fortunately, crisis was averted because Mom had already prepared for the worst and had a fork and knife in her purse. I don't like to eat with my fingers.

Usually, I'm at work and have just heated up some lunch when I realize the last plastic fork is gone. Now there is a solution.

Dine Ink!


Because I'm already busy and rarely stop working for lunch, now you really don't have to stop. Brilliant!


Who eats salad at work? Just kidding... Well, not really. You can never have too many pens, and you could always use an extra set of utensils. 


Some people have a bad habit of inadvertantly taking ink pens, but who would walk off with a fork?! See, these awesome pens also have a theft deterrent.

You can pick them up at Amazon. Makes a cool gift for yourself or anyone!


Wednesday, April 10, 2013

Caring for Your Stainless Steel Sink with BLANCO


I make no attempt to hide my appreciation for BLANCO sinks, faucets and accessories. It's easy to recommend a product when one knows the kind of people behind the product, as well as the quality of manufacturing.

While good people and manufacturing will sell me every time, it helps to be at the forefront of design(which BLANCO always is) and actively hang around once an item is installed in a home owner's space.


Stainless steel sinks have become one of our most specified BLANCO products. Beyond the construction and design of the sinks, BLANCO offers advice on the best way to care for your sink in order for it to keep it's good looks and function indefinitely. Shown above is the BLANCO Quatrus... It's a relatively new design that features tighter corners than anyone else in the industry! You'll see more of it on the blog soon.

Getting to know the BLANCO team has been a real treat... If you have a stainless steel sink from BLANCO or even if you have a stainless steel sink from someone else, this video featuring Christy Emens from BLANCO America shows the best way to care for your sink. She'll cover scratches, various stains(even though rust-looking ones) and general daily care. It's a good, quick watch from a real pro!


Hopefully these tips and tricks will keep your sink looking great!

Monday, April 8, 2013

Remodeling for Resale - Meg Fullington


As a full-time REALTOR® people approach me frequently with home selling questions.  Selling your home for the maximum amount possible requires preparation. You want to make sure any renovations you do give you maximum return on investment or (ROI). I’m constantly doing research to see what things can add the most value to a home without costing sellers a fortune. Some simple strategic changes can really help make a home stand out to buyers.  

Kitchens and baths are two of the biggest attractions to home buyers. More often than not it’s these rooms that play a pivotal role in the final buying decision.  Here are some tips to make these spaces shine and help seal the deal without breaking your wallet.

Kitchens:

via smarthomekitchen.com

As stated above, buyers love a great kitchen. Make sure that when deciding on changes to ask a real estate professional for their opinion. Keep it simple and don’t price your home out of your neighborhoods market. When budgeting, aim for a range of 6%-10% of the value of your home to get the most for your money.
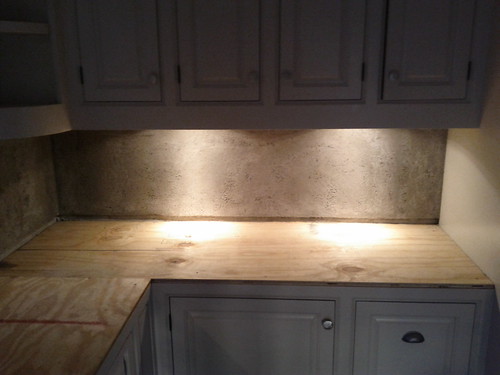
Lighting is a great way to add some punch to your kitchen. Changing some fixtures, adding under counter lighting can transform the entire space. Use neutral and natural colors and steer clear of over the top personalization. There are a variety of great looking counter tops that can update a kitchen without costing a fortune.  Clutter free and clean is what buyers are seeking so when in doubt, throw it out. The cheapest renovation to a kitchen is getting rid of counter clutter. Other items that can add some value are putting in special extras such as a warming drawer or soft closing drawers.

Baths:

via arkshowers.com

Nothing can date a home more quickly than a bathroom. However, it doesn’t mean that you have to completely re-do each one. Some simple fixes can do the trick. Again, changing out light fixtures and hardware can have a huge impact. Keep the color palette natural and steer clear of crazy shower curtains. One great feature that people love is a frame less shower door. These can really rejuvenate the look of a bathroom and come in a variety of prices. A nice updated shower head can also do wonders for the bath. You’ll want to check with experts who deal with renovations in baths to give you some ideas. Folks like Nick Lovelady at Cupboards can certainly give you some useful help in planning/pricing priority items of need for your bathroom renovation and then completing the task.

The final takeaway from this is keep it simple, stay true to your home’s aesthetic and only make changes that will add a lot of bang without pricing your home out of the market!

_______________________________________________

Really excited to have Meg Fullington drop in on the blog today. Hopefully we'll see her around these parts more often. If you're in the market for a new property or just trying to sell the one you have in the Auburn, Opelika or Lake Martin area, Meg is the lady for you! Make sure to check out her blog Auburn - Lake Martin Homes!

Tuesday, April 2, 2013

Bathroom Fun: There's an Octopus in my Bathtub

Well, sometimes it's nice to have a little fun with your guests/kids/in-laws. If Pirates of the Caribbean has regular showings at your house or you just happen to be fascinated with octopuses(by the way, the plural of octopus is octopuses, octopi or octopodes. Now you're also as smart as you are stylish.), these fun decals will certainly make bath time entertaining.


Too many times I see homeowners take very drastic steps to make kid's rooms and areas whimsical and kid-friendly. 35 bucks and you have tentacles coming out of the bath tub!? Worth it.


Better than just being $35, the decals are removable without pulling down sheetrock and studs. Once your kid or husband gets out of his "Yaaarrr Matey" phase the decal pulls off pretty easily and presto, you can hang up a nice print from some arty, more adult place.

all photos via Amazon

But in the meantime, have some fun and surprise your little sailor. I think I want to name the octopus coming out of my bathtub. I think I will name mine Lois.

Go ahead, splurge and buy one or two are all of them. I'm now waiting for the version that comes out of the toilet!

Tuesday, February 19, 2013

Bright Ideas for Under-Cabinet Lighting

Thanks to Jay Harris from Home Depot for sharing some awesome ideas on under-cabinet lighting... Good stuff!

light!

Trying to lighten up in the kitchen? Want more radiance in the bathroom? Under-cabinet and below-shelf lighting may be just the illumination you seek. Convenient, sleek, and often camouflaged, such focused task lights offer just a bit of brilliance where needed. Here are a few of the brightest DIY options, as well as details on installing each.

Rope Lighting
Often available in kits, rope lighting comes in a variety of colors and can also be hidden with paintable cord covers. The flexible LED tube offers a low-cost light source along an entire cabinet, shelf, or railing and plugs into an ordinary wall outlet.


  • Use a pencil to draw the exact route you're planning for your rope lighting.
  • Drill any holes needed (for instance, if you're threading the light from the interior of one cabinet to the next) using a drill bit that is slightly larger than the thickness of your light.
  • Measure how long your rope light will need to be, then cut it, keeping in mind that the light may only be safely cut in specific areas (often at 18-inch intervals; consult the manufacturer's instructions to be sure).
  • Thread your light through the holes and attach cable clips for support where necessary.
  • Place the plastic cap from the kit on the end farthest from the power source.
  • On the other end, insert the male electrode into the rope light conductors. Attach and tighten the provided collar and sleeve, then fit the female connector (attached to the power cord) to the male electrode spikes. Screw on the support connector to ensure the male and female connectors remain together.
  • Then simply plug in the power cord. Use a switch-operated outlet to eliminate the need to plug and unplug the light.
  • Fluorescent Lighting Fluorescent lighting comes in lots of shapes and sizes that are easy to install. Though the bulbs may distort colors slightly, they are energy efficient and long lasting. Depending on the model you buy, this thin-profile light source can be wired into place or plugged into a regular socket. Unless you feel comfortable with electrical work, I recommend the latter.
  • Remove the diffuser and bulb from the fixture to gain access to the screw holes.
  • Holding the fixture up to the underside of the cabinet where you would like it to be placed, use a pencil to mark the drill holes. (Bring the fixture as far forward as possible, at least two inches from the wall. You also want to situate it close enough to an outlet for the plug to reach.)
  • Using your marks as a guide, drill pilot holes into the bottom of the cabinet.
  • Attach the fixture using the screws provided. (Before screwing it in, be sure the supplied screws aren't longer than the shelf is thick -- if so, they will poke up through the bottom of the cabinet and you will need shorter screws.)
  • To control the cord placement, strategically place cord clips along the underside of the cabinet and the wall, or install lengths of self-adhesive conduit to conceal the cord.
  • Reinstall the bulb and diffuser and then plug in your light. Just as with the rope lighting, a switch-operated outlet eliminates the need to plug and unplug the light.
  • Puck Lighting Inexpensive puck lights provide perfect color accuracy and are relatively easy to install, gaining power via an outlet or a hard-wired transformer. While halogen lights are safe under cabinets, they're too hot to be mounted inside a cabinet or near plastic or paper goods. For a cooler option, choose xenon bulbs.
  • Lay the pucks, in the arrangement you would like them to appear, directly below the cabinet/shelf to which you will be mounting them. (Hint: Measure the distance from the bottom of the cabinet to the countertop -- this is how far your lights should be mounted from one another.) Be sure to allow room for the cord of the final puck to reach an outlet.
  • Remove the trim ring and lens from each puck, then use the puck or a template (if provided) to mark drill holes on the underside of the cabinet.
  • Drill pilot holes slightly smaller than the supplied screws. (Just as with the fluorescent light installation, be sure the screws aren't too long.)
  • Attach the lights to the cabinet.
  • Wire the puck series together using the plug-in cables provided in the kit, and then secure the wires behind or underneath the cabinet and down the wall using wiring clips.
  • Power the lights by plugging the last puck into an outlet or connecting it to a transformer (if you have the know-how).
  • Do these ideas set off any light bulbs for brightening up your own spaces? If you have installed your own lighting before, do you have any tips for first-timers that I might not have covered above? Jay Harris is a Home Depot sales associate and contributes regularly to Home Depot's blog. His electrical interests in the home include home security systems and home automation.

    Monday, January 28, 2013

    New Erin Adams Designs for New Ravenna Mosaics

    I had the pleasure of meeting Erin Adams(along with the rest of the New Ravenna Mosaics team) last year in Orlando. It only takes a few minutes of looking at Erin's handiwork to see that it's really awesome in every way.

    Even with huge design advancements in the tile industry, New Ravenna continues to lead the charge. Often duplicated, the team at New Ravenna Mosaics is always a step ahead.

    With the new releases from designer Erin Adams, New Ravenna is a leg up on the competition again. Take a look at a couple of designs from this month's release.


    My personal favorite is Coral- Check out the color palette... Pinks and oranges for everyone! 


    Another pattern released is called Floating Fish. Again, great use of color and endless application opportunity!


    all photos via New Ravenna Mosaics

    Made in Virginia, New Ravenna Mosaics are available through a tile showrooms in the United States, Canada, Europe and Dubai. The tile mosaics can be used on floor or wall applications, indoors and out (and would look awesome on your next project).

    Friday, January 25, 2013

    IMM Cologne/Living Kitchen Recap with BLANCO Modex

    Last week I was so fortunate to attend the IMM Cologne and Living Kitchen show in Cologne, Germany as a guest of BLANCO. As you may or may not know, I am a member of the BLANCO Design Council(the US version) and part of this year's fun was to attend the show. Travelling with BLANCO this year was Andie Day, Jamie Gold, Grace and Ken Kelly, Cheryl Clendenon, Kelly Morisseau, Leslie Claggett and Susan Serra along with myself. Paul Anater was along too, but also travelling with the BlogTour Cologne Group.

    Now a warm, Southern boy like me doesn't comprehend northern Germany in January. Let's just put it this way... It was COLD.

    The show was nothing short of awesome, and no one had better show "mates" than I did. 

    Kelly Morisseau, myself and Cheryl Clendenon at BLANCO IMM Cologne. (photo by Lori Dolnick)

    I was lucky to have two of the premier kitchen designers in the US to chat with as we ran around the show. IMM Cologne and the Living Kitchen isn't your local home show. The show itself is massive and every credible European brand rolls out the red carpet to showcase new products and offerings.

    Now it's not because BLANCO was kind enough to schelp me to Germany for the show, but they easily had one of the best booths. Not only were they announcing TONS of new product for the European(and some US) market, but the design of the booth and space were spectacular!


    A large sweeping arch(complete with waterfall) guided showgoers through the heart of new product lines, while a raised cafe' and seating made a perfect spot to rest a moment and have a snack. Huge kudos to the BLANCO design team... The booth was nice enough that I didn't want to leave!

    As expected, the awesome booth wasn't just fluff. The new products launched made the space. One of my favorites combined two launches for the US market.

    photo by BLANCO

    This is the MODEX sink. It's a raised sink that's part of the BLANCO SILGRANIT II family that allows homeowners to wash, cut and prep right in one place. Because of it's striking features, the MODEX looks great as the centerpiece of any kitchen design.

    photo by BLANCO

    If you're unfamiliar with the color, that's because it is new, too! Cinder is the latest color in the SILGRANIT II collection and is a perfect mix of gray, brown and black. It's a super color that is the perfect compliment to both light and dark counters. Cinder is available in the BLANCO SILGRANIT II sink family as well as two faucets.

    I'll have lots more coming up from both BLANCO and other sights from around IMM Cologne and the Living Kitchen in upcoming blog posts. Until then, I'll continue to try and recover from a grueling, but awesome week with BLANCO and the BLANCO Design Council.

    When the show has you beat, just find a gigantic silver lame' sectional to crash on with your friends.

    Cheryl, Nick and Kelly... Resting. photo by Lori Dolnick

    Other trip thank yous:

    Lori Dolnick from Frank Advertising, Tim Maicher and Christy Emens from BLANCO USA, Veronika Miller and Tim Bogan from Modenus. Thanks for making this trip awesome!

    Friday, January 11, 2013

    When Trends Attack! Pallet Edition Part 2

    Way back in April of 2011, the first edition of pallet nastiness came up on the blog with When Trends Attack! Shipping Pallet Edition. Well, here we are again with more information, more wackiness and an endless supply of angry commenters convinced I am needlessly afraid of dirt... or especially accusatory of questionable parenting skills.

    So let's go!


    Since I am not a scientist, chemist or horticulturalist, I decided to reach out to some and see if they had any insight or could offer some information to continue the pallet discussion. Interestingly, each responded similarly when I approached them about using a used shipping pallet in an interior application. They didn't come right out and exclaim "GROSS!", but it would be a good laypersons interpretation of the information.

    The most interesting part of the debate has been the vitriol thrown back at me for even questioning that a pallet wouldn't be safe in one's house... or even a child's bedroom. 

    *shudder*

    Needless to say, there are plenty of comments from the original blog post as well as follow-up posts from Curbly and Apartment Therapy. 

    On Apartment Therapy, lazy_lurker said, 

    "The most dangerous compound that many of us are in daily contact with is gasoline. The bit that one whiffs when gassing up is way more dangerous than the wood's preservatives."

    Let's touch on that... a local university professor explained to me that in many cases pallets are stored on slabs/pavement and can be exposed/soaked in lead and other heavy metals or petroleum products. "As you know, small children and pets are more likely to suffer from heavy metal poisoning than adults. I suppose if the wood were totally sealed it would keep the contaminants in, but if that wears off over time or the wood breaks, they could be released. I don't know what concentrations of toxins you'd find in old pallets. It might be low, but it might not be," they shared.

    So add a new chemical opportunity to our pallet scavenging... Lead and petroleum!


    On the blog here, Anonymous said, 

    "Internationally shipped pallets are often soaked or fumigated with toxic chemicals to discourage insects. These chemicals are slowly released; quickly released if the wood is tooled or cut."

    This is partially true. Pallets that are certified for EXPORT can be treated one of two ways: chemical fumigation or heat treatment. If you are searching for pallets and discover one with the IPPC HT stamp, it's been heat treated only. Any chemical/bacteria that could be present would be post-production. If you see an MB stamp, that means it's been treated with Methyl Bromide. Since Methyl Bromide treatment was essentially halted altogether in 2010, if you find a pallet marked MB it's definitely not new and has likely been around the block a few times(in addition to being chemically treated).

    On the insect front, Purdue University Extension expert and Horticulture Educator(also known as The Magic Gardener) Larry Kaplan shared that it's generally regarded that the very invasive Emerald Ash Borer was introduced to the United States and Canada via none other than pallets. In addition, an infestation of the Asian Long Horn beetle in Chicago was also linked to imported pallets.

    So maybe internationally shipped pallets are more dangerous? Consider this... Domestically produced pallets often have NO TREATMENT at all. Buggy heaven.

    My local university source chimed in, "If they're(pallets) not treated, I would be worried they would bring in or even ATTRACT bugs INTO my house, and I would find little piles of sawdust all over the floor. Beetles, termites, I'm sure there are lots to choose from."


    Alabama Pesticide Residue Laboratory Director Danny LeCompte gave some great tips on where could be less glamorous places to scoop up a pallet.

    "I would not use a pallet from an industrial site where hazardous materials are/might be used, produced or shipped. I would not use a pallet from an agriculture based business because of the possibility of contamination with  pesticides and other ag chemicals."

    And my favorite line from Director LeCompte, "A dirty pallet might be used for a compost bin but not for furniture for a child (however, the possibility for soil contamination still exists)."

    If you're going to reuse pallets, the higher risk comes from those in industrial and agricultural businesses. BUT bear in mind that pallets are reused by companies and the original freight may not be known.

    via Houzz

    LeCompte also went on to add that just having the pallet itself doesn't pose the only threat.

    "Wood from a pallet impregnated with a chemical or hazardous substance should not be used, period. Sanding or cutting the wood will create airborne contaminated particles which could be inhaled or inadvertently swallowed. Contamination can be absorbed directly through exposed skin when working with the wood or when using the constructed craft product later."

    Even if your salvaged pallet looks safe, it could become quite dangerous when you deconstruct or work the wood.


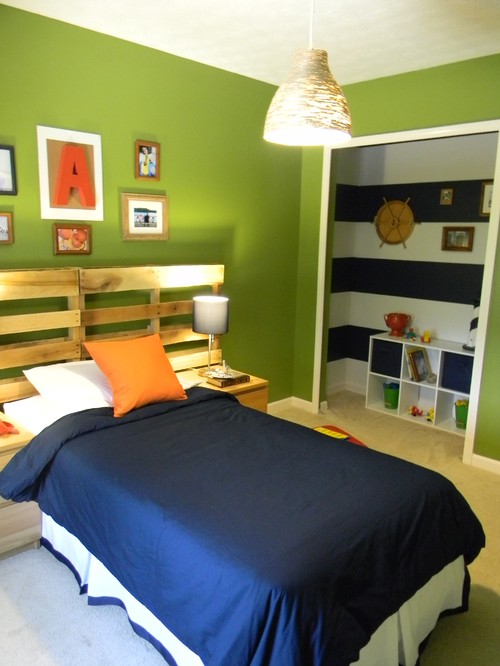
    Some pallet projects aren't so bad(see above decor). Be responsible and use them outdoors. If you can't live without having some pallet project in your home, find your local pallet producer and buy some new ones. Virtually every big city has multiple producers. If you're like us and out in the middle of nowhere, ULINE has them available online. If you have to have them, buy them. The last thing I want to get in to is an ethical discussion about stealing pallets from behind the local hardware store.

    Here's the big disclaimer before I get a bazillion angry comments: I grew up on a farm(with dirt), I'm not afraid of germs, I'm rarely politically correct. In past comments about pallets I've been accused of being dumb, stupid, paranoid, shallow, arrogant, fear-mongering and trying to judge someone as a bad parent. I've also been told to simmer down and get some perspective. 

    Perspective, eh?

    Mr. Kaplan from the Purdue Extension Service emailed me this tidbit AFTER we had talked about technical pallet things... I thought it was very interesting and personal.

    "I can provide an anecdote that would explain why I would never, ever allow pallets inside my home.

    If you have a weak stomach, stop reading now...

    Back before I got into Extension, about 30 years ago, I worked for a couple of years in the produce receiving market in Boston area.  Thing of a giant warehouse, with trucks surrounding a central structure that held all the coolers and produce holding areas.  The truckers were in a rush to get in, get loaded/unloaded, and leave; the workers earning minimum wage were always being rushed by the owners to move stuff in and out.

    As pallets were unloaded, any less-than-perfect pallets were tossed off the dock onto the pavement below.  Any rotting fruit/vegetables were also usually tossed off the dock, too.  Seeing various rodents scurrying about was not unusual.  And, because of the rush, rush, rush, and possibly because the owners may have discouraged the workers from using the nice clean bathrooms, it was not unusual to see some of the workers urinating off the side of the dock.  Onto the rotten produce and pallets.

    Every so often, the whole mess was cleaned up by the terminal owners.  I've no idea where all the pallets and other semi-salvageable debris went, but I know not all of it went to the dump.  Some of it was picked out for reuse.  Salvaging discards was a big business.

    Yeah...think about that...

    It took me a year after leaving before I could force myself to open a jar of pickles, but that's a story for another time..."

    Bottom line is this: All of the hazards are possibilities. Certainly you could pick up 10 pallets and have no single issue, but risky behavior is simply risky behavior. Why do we seek out BPA-free plastics, organic foods, no-VOC paints but are okay with bringing trash in the house? 

    Feel free to disagree. There's no agenda on my part other than the concerns I have in my own home. 

    Here are the links to the other posts mentioned:


    Related Posts Plugin for WordPress, Blogger...